

How to Add a Custom Domain to Your vCard or Store?
1. Access Your DNS Management
Log in to your domain registrar's account (such as GoDaddy, Namecheap, Bluehost, or Cloudflare) and open the DNS Management section for the domain you want to connect.
2. Add a CNAME Record
Create a new CNAME record with the following details:
| CNAME | @ | mercadopago-rec.goapps.co.in | DNS Only | Auto |
- Host: @ (Represents the root domain.)
- Value: mercadopago-rec.goapps.co.us
- Proxy Status: DNS Only
- TTL: Auto (or your preferred value)
If you're using Cloudflare , refer to the following guide:
Настройки на DNS на Cloudflare
Настройка на Cloudflare DNS записи и правила на страницата
1. Setting Up Cloudflare DNS Records
Влез в Cloudflare
- Visit the Дашборд Cloudflare and log in to your account.
Изберете Вашия домейн
- От таблата изберете доменът, който искате да конфигурирате.
Добавете DNS записи
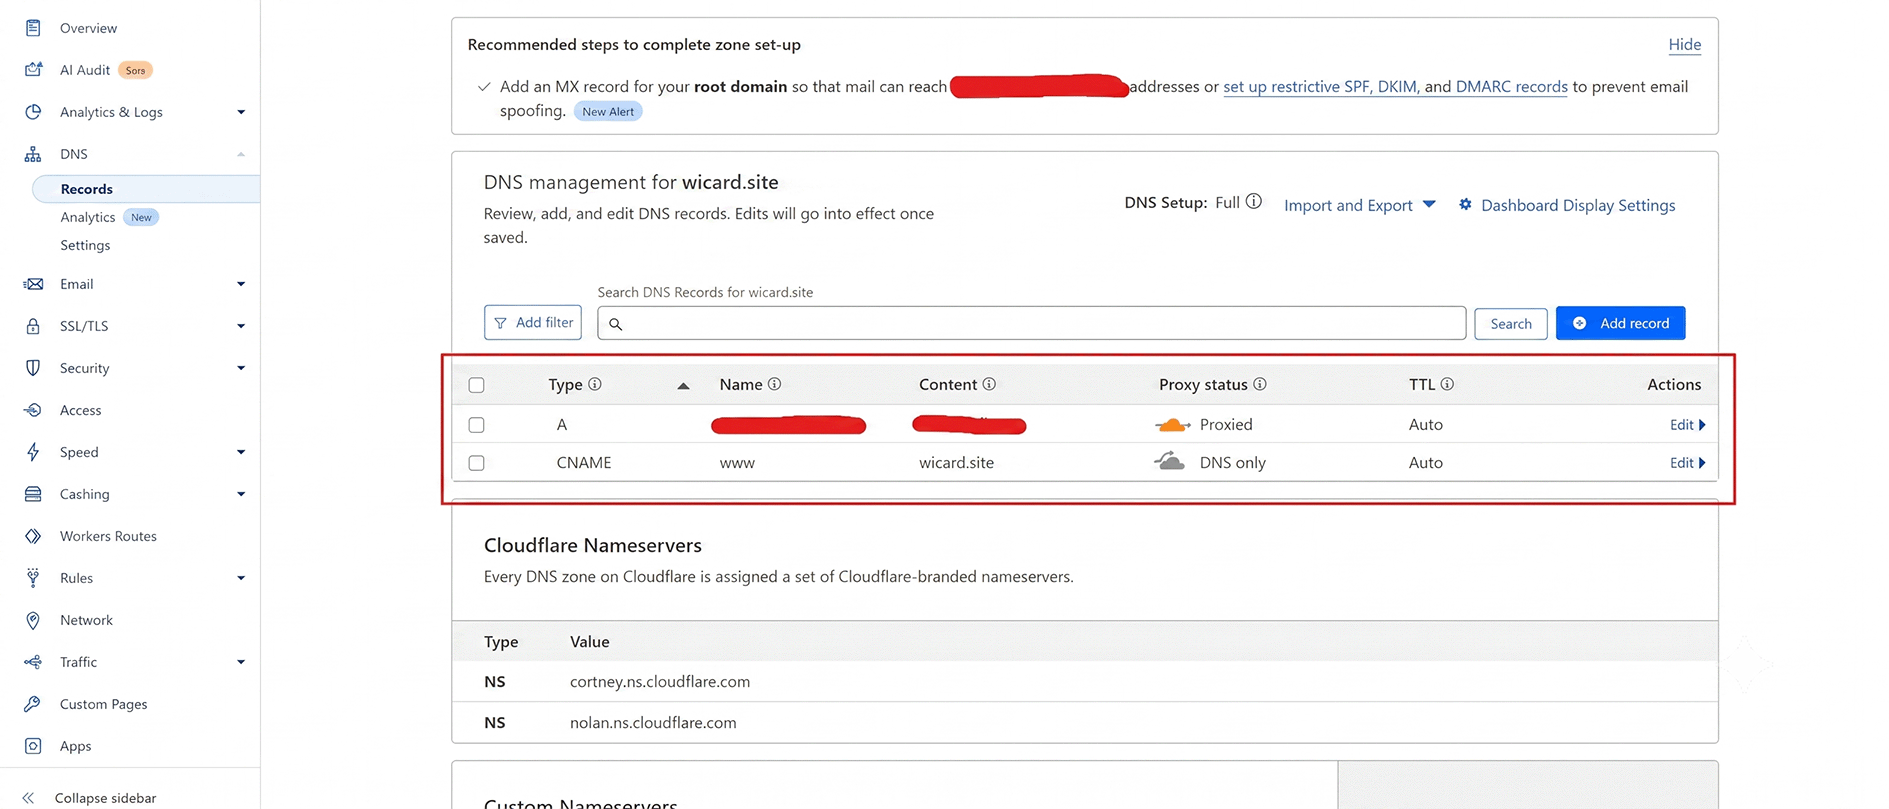
- Go to the DNS tab and click Add Record to add the necessary DNS entries.
| А | @ (root domain) | Enter your server’s IP address | Enabled (orange cloud icon) | Auto |
| CNAME | www | mercadopago-rec.goapps.co.in | Disabled (gray cloud icon) | Auto |
- Запазете всеки запис след като въведете детайлите.
DNS Record Example:
2. Creating Page Rules
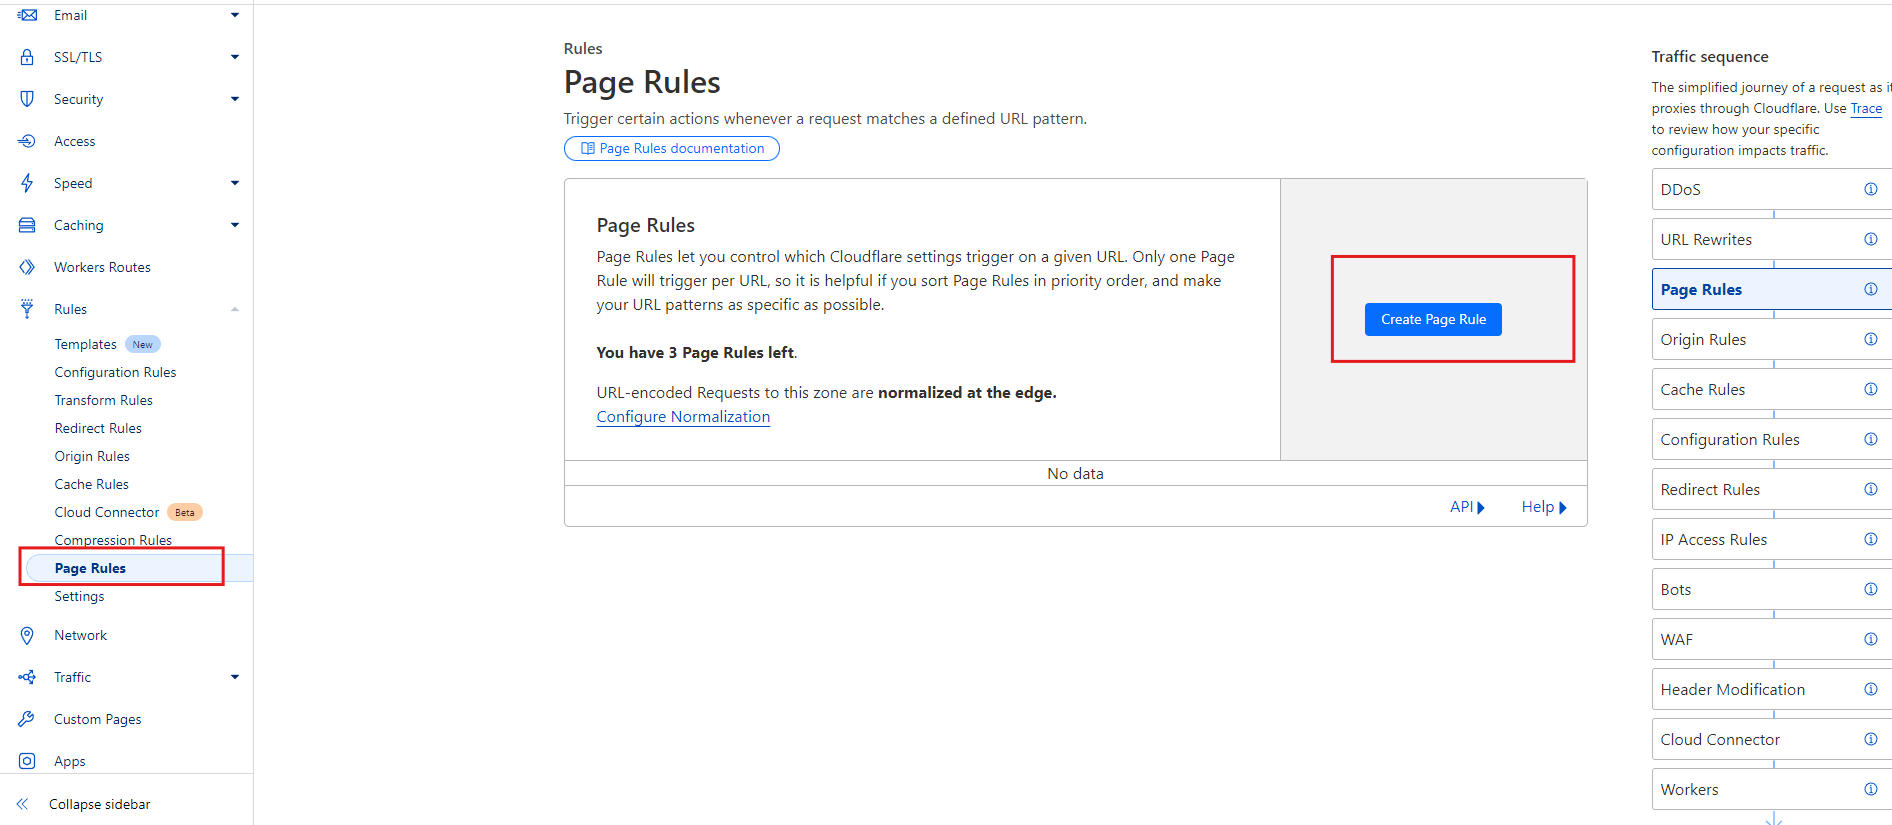
Навигирайте към Правила на страницата
- Go to the Page Rules tab on your domain's dashboard.
Добавете правило за нова страница
- Click Create Page Rule and configure rules as needed.
Пример Правила на страницата:
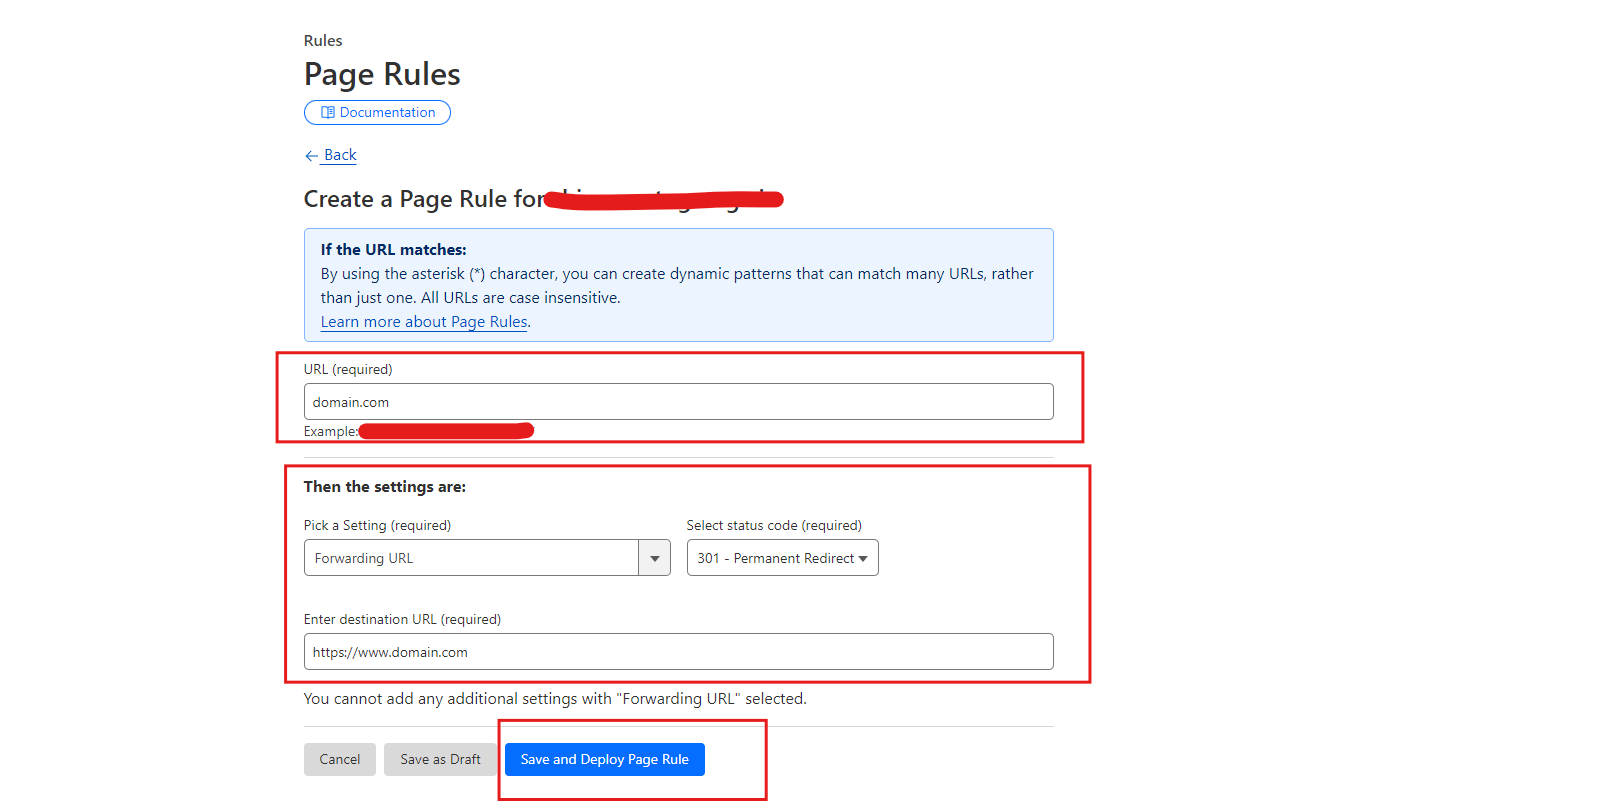
Пример Настройки на правилото на страници:
| example.com | Препращане на URL | 301 Постоянно пренасочване | https://www.example.com |
Пример за пренасочване:
Винаги използвайте HTTPS
| example.com/ | Винаги използвайте HTTPS |
Click Запазвайте и разпределете to activate the rule.
Tip: Page rules are applied in order from top to bottom. Arrange them carefully based on priority. Use wildcards (*) for broader rule coverage, like *example.com/* to cover all pages.
3. Save the DNS Record
Save the CNAME record in your DNS management panel.
Забележка
DNS changes may take some time to propagate, depending on your domain provider.
4. Configure Your vCard or Store
After adding the DNS record, enter your custom domain (for example, yourdomain.com) in your vCard or Store settings and submit the request.
5. Domain Verification
Once you submit the custom domain request, it will be sent to the website administrator for approval.
The administrator will verify your DNS configuration and assign the custom domain to your vCard or Store. Until then, the request will remain in the Процес на обработка status.
Важното бележка
The steps for adding a CNAME record may vary depending on your domain registrar or DNS provider. If you have any difficulty, refer to your provider's documentation or contact their support team for assistance.
Pager